Can You Tile Over Painted Surfaces?

It’s no surprise that tiling adds a touch of style and durability to your home. But before you dive into your tiling project, it is important to consider the surface you’re working with. One common question on a lot of people’s minds is: ‘can you tile over paint’?

Well luckily for you, in this blog, we’ll explore the do’s and don’ts of tiling over paint and provide you with the information you need to make an informed decision. Don’t forget to stock up on our impressive wall tiles before starting any DIY project. 

Let’s get into it! 

Can you tile over a painted surface? 

So, can you tile over paint? Unfortunately, it’s generally not recommended to tile directly onto a painted surface. While it might be possible in some cases, it is not ideal and can lead to issues like poor adhesion and tile failure. A detailed examination of your painted surface should be made to decide whether it’s suitable or not. 

Here are some reasons why it’s not a wise idea to tile over paint: 

Poor adhesion – paint can create a barrier between the tile adhesive and the underlying surface, reducing the bond strength. 

Paint failure – the adhesive can reactivate the paint, causing it to peel or bubble. 

Tile failure – weak adhesion can lead to tiles falling off, especially larger or heavier ones. 

However, if you are determined to tile over a painted surface whether that’s in your bathroom or kitchen, then there are some things that you should consider before doing so. These include: 

The type of paint – gloss paint is generally more suitable for tiles than matte or emulsion paint as it provides a smoother, harder surface. 

The condition of the paint – the paint already on your walls must be firmly attached and free from cracks or peeling. 

Your tile size – whether you’re using kitchen tiles or ceramic tiles, a smaller sized tile is more suitable as they are less likely to fall off. 

The adhesive you use – we recommend using a high-quality and flexible adhesive that is designed for difficult surfaces. 

Properly prepare – thoroughly clean and roughen the painted surface to improve adhesion.  It is also advisable to score the paint as much as possible with a sharp blade.  This will allow the adhesive to bond to the subsurface.

If you’re still unsure, we recommend consulting with a professional tiler for advice or contacting us. Wondering whether you can tile over tiles? Have a read of our blog to find out! 

How to remove paint from a surface 

Now that you know that it’s best to tile onto a paint-free surface, you might be wondering what the easiest way to remove paint from a wall is. Luckily, there are plenty of easy rules that you can follow to make the process that little bit easier and prep your walls for their new tiles. 

Assess the paint – first of all, determine if the paint on your wall is oil-based or water-based. Oil-based paints are a little bit more difficult to remove. Check if your paint is peeling or flaking – if it is, this is good, as it will be easier to remove! 

Choose your preferred method – next, think about hows best to remove the paint from your wall. One preferred method is scraping, where you simply use a paint scraper or small knife to scrape off loose or peeling paint. Or you could use medium-grit sand paper to roughen the surface for better tile adhesion. 

Remember: ensure you have good ventilation if you decide to use any chemical strippers and to wear the correct safety gear. You can also test a small area of your wall before removing your paint to see which method works best for you. 

Don’t forget to pick up your tiling tools and accessories to make your DIY job that little bit easier. 

Prep for your walls for tiling 

Now that you’ve stripped your wall free of paint, it’s time to tile! Whether you’re tiling your kitchen or your bathroom, we’ve got the perfect tiles to suit your hands-on project. 

Once you’ve scraped or steamed away your paint, there might be some residue like dirt or grease that prevents your adhesive from sticking to the surface. We recommend using a damp sponge or cloth and a small amount of mild cleaner with warm water to remove as much of the residue as possible. 

Once the area is clean from residue, you’ll need to key the surface. Keying the surface helps your adhesive grip to the wall by creating small, rough grooves that help to maximise adhesion. A simple way to do this is by using sandpaper or scoring it with a knife or scraper. The rougher the surface, the stronger the tile adhesion will be! 

After following these steps, you’re most likely to be tiling onto a more porous surface such as plaster. This is where we recommend using a primer, because when cement-based adhesive meets plaster, a reaction occurs that prevents adhesion and therefore your tiling will most likely fail. So, always use a primer! 

Remember: your primer must be completely dry prior to tiling. 

Choose affordable tiles with Raynesway Tile & Bathroom Warehouse! 

Hopefully, this blog has answered your question to ‘Can you tile over paint’? While the recommended advice is no, we hope we’ve provided insights on how you can remove paint from surfaces and undertake the correct prep before starting your tiling project. 

Here at Raynesway Tile Warehouse, we can provide you with our professional guidance to help you see your project through to completion. With one of the largest showrooms based in Derbyshire, we stock all the tools you need and a versatile range of tiles that will brighten up any space. 

For more information, please don’t hesitate to get in touch. Or, feel free to call us on 01332 492 106. A member of our team will be more than happy to get back to you! 
How to Measure a Bathroom For Tiles

One of the very first problems you’ll face when deciding to retile your bathroom is ‘how to measure a bathroom for tiles’. Thanks to the unique size of every bathroom, which is made all the more complex by awkwardly shaped toilets and basins, measuring your space can be a fiddly task. Luckily for you, we’re here to help, with this blog delving into how you can easily measure your bathroom for tile installation.

Whether you’re looking for bathroom tiles to give your room a renewed sparkle or want some inspiration for a feature wall of kitchen tiles, visit Raynesway Tile Warehouse in Derby and transform your house today.

Tools and materials

Before you get down on your hands and knees, you’ll want to invest in some proper tools to make sure your bathroom measurements are as accurate as possible. These range from basic pieces of equipment that should be found in any personal garage or DIY box to specialist items that you should certainly consider purchasing before getting started. Such items include:

  • Calculator
  • Diamond Blade
  • Notepad and pencil
  • Rubber grout float
  • Spirit level
  • Tape measure
  • Tile cutter
  • Tile Nipper
  • Tile spacers
  • Tile trowel

At Raynesway we offer a range of high-quality, durable tools and accessories for tiling with our team of experts being more than happy to instruct on the proper way to use each item.

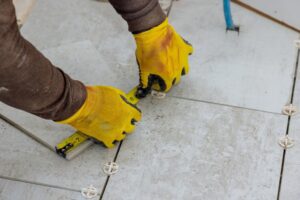
contractor measuring tiles

Preparation for tiling

Once you have the tools together, now you can get started by preparing your bathroom to be tiled. This stage ensures the most accurate measurements possible and should start by removing all furniture, bins, bath mats, storage towers, picture frames or any other portable fixture that isn’t fixed to the floor. Doing this gives you complete and unobstructed access to all areas of your bathroom. Next, it’s wise to clean the entire area to remove any particles or pieces of dirt that might disrupt any measurements.

You will likely have already considered the desired size of your tiles before you reach this point, but this is the stage where you need to confirm this information. Consider the needs of your space and select tiles accordingly, for example, smaller tiles offer more versatility for colourful creativity whereas larger tiles open the space out and are also easier to clean thanks to their smaller number of grout lines. If you’re wondering what size tiles you should buy for your small bathroom, or want advice on how to design your space, contact us and our expert team would be happy to lend a helping hand.

How to measure your floor for bathroom tiles

Right, let’s get down to business. Unfortunately, measuring a bathroom floor for tile installation is no easy task thanks to how different each room is shaped from one house to the next. While some bathrooms will be tiny yet have no existing fixtures, others might be large and awkwardly shaped with immovable bathrooms, sinks and more to contend with. Let’s start by outlining how to measure empty rectangular-shaped bathrooms for floor tiles, aka a tiler’s dream job.

  1. Measure the length of the shorter wall and record the number in cms. Make sure the tape measure is placed as flat to the wall as possible for the most accurate measurements.
  2. Do the same with the length of the longer wall and record the number in cms.
  3. To work out the total area of the room simply multiply the calculations of both walls. We now need to convert this figure from cm2 to metres squared, so divide the total by 10,000 to find the total area of your space in m2.
  4. Accidents happen, so to cover for cutting mistakes and breakages, add in a wastage allowance of 10% of the total area calculation.
  5. Once you have these measurements, it can be useful to create a bird’s eye view sketch of the space, allowing you to better plan the design of your bathroom going forward.

How to measure your walls for bathroom tiles

Measuring the walls of your bathroom for tiles is very similar to measuring your floor, however, the process is often complicated by the presence of windows, extractor fans and more that need to be accounted for. To discover the area of a bathroom wall, abide by the following steps so that your wall tiles will be fitted as efficiently as possible:

  1. Measure the height of the wall and record the number in cms. As outlined above, make sure the tape measure is placed as flat to the wall as possible for the most accurate measurements.
  2. Measure the length of the wall and record the number in cms.
  3. Multiply both calculations together to find the total area of your wall in cm2. Convert to m2 by dividing this number by 10,000.
  4. Next, measure any obstructions like windows using the same method outlined in steps 1, 2 and 3.
  5. Subtract the m2 measurements of any obstructions from the total area of the wall.
  6. Work out 10% of this total calculation and add it on as wastage allowance. You now have the total area of your wall in m2.

craftsman measuring bathroom tiles

How to measure complex bathroom floors

While perfectly rectangular rooms are a tiler’s fantasy, complex and awkward-shaped ones are nightmares. But, fear not, just because such rooms require a little more calculation, don’t be intimidated by the necessary mathematics, with it really being quite simple how to measure complex bathroom floor spaces.

  1. Draw a sketch of your bathroom floor space from a bird’s eye view – be as accurate as you can.
  2. Divide the sketch into regular rectangle shapes. Number each of these sectors.
  3. Treat each of these rectangles as separate floor spaces and measure them accordingly, abiding by the steps about how to measure your floor for bathroom tiles as outlined above.
  4. Once each of these separate rectangles has been calculated, add each m2 together to get the total area of your awkwardly shaped space.

Still unsure how to measure a bathroom for tiles?

If you’ve read through this guide and are still scratching your head, don’t panic, tiling can be fiddly work, especially if you’re doing it all by yourself as a DIY project. At Raynesway Tile Warehouse we can provide you with professional guidance to help you see your project through to completion, boasting one of the largest showrooms in Derbyshire, stocking the tools you need and a versatile range of tiles that would brighten up any space.

From stylish bathroom surfaces to exemplary kitchen tiles and even artificial grass for your outdoor space, explore our range of products online today and visit us in-store to begin refreshing your home.

What Size Tiles Should You Use for a Small Bathroom?

Choosing the right tile size is one of the most important choices you’ll make when designing or renovating a small bathroom. Tile designs can have a huge impact on the appearance and feel of your bathroom, and selecting the wrong tiles can make your space seem small and congested.

In this blog, we’ll explain what size tiles are best for a small bathroom and what layout tips you can use to help your bathroom appear beautiful and spacious.

At Raynesway Tile Warehouse, we have a stunning selection of tiles to help you transform any room from bedroom to bathroom.

Size matters – Tile Size in bathrooms

Tile size affects the feel and overall appearance of a small bathroom and that’s why it’s crucial to know what size tiles to use for a small bathroom. There are several factors to consider regarding bathroom tiling alongside size including finish, grouting and tile proportions.

Whilst smaller tiles offer more design and texture opportunities, larger tiles often give a smooth, uniform and more open appearance to a room. The grout lines between each tile can also significantly impact the feeling of space in a room.

Alongside these aspects, you’ll also need to consider how wall tiles and floor tiles interact with each other as well as what you want to achieve with your bathroom aesthetic. If you are focused on creating a decorative bathroom your tile choice will inevitably be different to that of someone looking to create the illusion of a larger space.

large bathroom tiles

Large Bathroom Tiles

You might think that large tiles may be an odd choice for a small bathroom, but they’re actually a brilliant choice.

Advantages of Large Tiles

Less grout lines: Larger tiles mean less grouting used throughout the bathroom. This creates the feeling of a more continuous, unbroken surface which helps to create the illusion of additional space.

Modern aesthetic design: Larger tiles offer a more minimalist look which is great if you’re looking to create a modern simple yet stylish bathroom.

Less maintenance: With less grout on the walls you’re likely to encounter fewer issues with mould and dirt collecting in cracks and small places. An even flat surface makes cleaning quicker and easier and you can keep heavy scrubbing to a minimum.

When choosing large tiles you also need to consider the colour, material and finish. If you want to maximise your space, opting for white ceramic tiles is ideal. These tiles are light in colour and have a glossy, reflective finish which helps to make your bathroom look bigger when lit. Glossy surfaces are also easier to rinse and wipe clean compared to textured tiles.

small bathroom tiles

Small Bathroom Tiles

Bathroom designs frequently feature small tiles, like subway tiles or mosaics, but in smaller bathrooms, these tiles must be positioned thoughtfully.

If you want to know what size tiles for small a bathroom to create an aesthetic design, then small tiles are the option for you.

Advantages of Small Tiles

Flexible design possibilities: With small tiles, you can create a stunning feature wall and add dimension to your walls and floors. You can also tile smaller surfaces like baths, mirrors and shower floors for extra decorative effect.

Additional safety measures: What size tiles for a small bathroom floor? Using small tiles as floor tiles in areas like showers and wetrooms is ideal as they create additional grip and are much safer than using large glossy tiles. The extra grout used around smaller tiles reduces the chance of slips and falls you might encounter on a smooth tiled surface.

Texture, detail and depth: Using smaller tiles means you have more opportunity to experiment with a range of different textures, colours and finishes in your bathroom, even if you’ve got a small surface area to work with. Using textured tiles can add accents to your walls or floors without overcrowding the space.

If your main focus is creating a stunning decorative bathroom then small tiles are great, but it’s important to make sure you don’t use too many. Adding little tiles across the bathroom can lead to a lot of messy-looking grout lines and make for difficult cleaning. Whole rows of small tiles can also make a bathroom look crowded and more cramped, so make sure you carefully place each smaller tile.

Bathroom Walls and Floors

In tiny bathrooms, medium-sized tiles give a brilliant balance between less grout lines and creative versatility, making them perfect for use on both walls and floors.

Medium Size Tile Advantages

Versatile design: Medium tiles provide a versatile style that can be used to create both traditional and modern design aesthetics.

Easy installation: Less cutting and handling is required when installing medium-size tiles compared to larger tiles. Smaller tiles can also be fiddly and require more precise and longer installation time. Medium-sized tiles strike the perfect balance.

Uniform appearance: Medium-sized tiles give the room a polished, well-balanced look without being overpowering.

So what size tiles for a small bathroom will have the most impact on your walls and floors? If you want to create an even, harmonious space then medium tiles of the same size are the option for you. These tiles will draw attention away from the walls so you can enjoy statement bathroom suites or bathtubs.

Big Impact in Any Small Bathroom with Raynesway Tile Warehouse

Now you know what size tiles are best for a small bathroom it’s time to pick the perfect ones for you, and there’s no better place than Raynesway Tile Warehouse. We offer a brilliant selection of high-quality tiles to suit every style and budget. Whether you’re renovating your small bathroom or bringing new life into your kitchen, our expert team is here to help you find the perfect tiles for you.

Visit our showroom or get in touch with our friendly team and we’ll use our expert knowledge to advise you on the right finish, size and style of tiles for your project.

Are You Looking to Give your Bathroom a New Lease of Life?

Over time bathrooms can become dull and drab and eventually will be in dire need of an update. When that day comes, here at Raynesway Tile Warehouse we are happy to be of assistance. No matter how big or small your bathroom is you can make the most of the space that you have and create a stunning area in which you can unwind. Continue reading “Are You Looking to Give your Bathroom a New Lease of Life?”

Essential Advice For Getting Your Conservatory Ready For Spring

It might seem like it’s been a long time coming, but the spring is almost upon us; our cars aren’t frosted over in the mornings, temperatures are starting to hit double figures and we’re actually starting to feel the warmth of the sun, instead of just being blinded by it on our drive home.

With that in mind, preparations need to be made to make the most of the warmer weather, and if you have a conservatory then that’s the place to start. These top tips will help you transform your conservatory from a cold, uninviting room that’s been neglected to a vibrant, warm and welcoming relaxation spot.

Revitalise The Design & Introduce Plant Life

Interior design is an important aspect of any room in your house, whether it’s something you simply do subconsciously or something you set out to change or do a particular way. Spring designs are all about making your conservatory feel relaxing and inviting, as well as fairly light and bright – much like the weather and landscapes outside.

Soft blues, creams, greens and yellows work well as choices for colour schemes, and can be applied to everything from your painted walls and floor tiles to upholstery and furniture. We stock a huge selection of floor tiles, and you’ll be bound to find something in our range that fits your new bright design.

Plant life and flowers can also be introduced to complement your colour scheme, as well as adding to the relaxing nature of your conservatory. Look for plants with pastel-coloured flowers, such as tulips or African lilies.

Refresh Your Conservatory’s Flooring

This can tie in with the interior design section of this article, but changing our conservatory’s flooring can simply be a way to refurbish something that’s perhaps looking a bit old and tired and in need of an overhaul. When it comes to flooring in your conservatory, especially in the warmer temperatures of spring and summer, then wood flooring and carpets can often be not so great a choice – they have a tendency to fade and be affected far more by the direct sunlight and the heat of the sun than other kinds of flooring.

Quality stone or ceramic tiles from our range of floor tiles here at Raynesway Tile Warehouse will help you transform any conservatory into something far more appealing and inviting. We stock a wide selection of styles and colours, allowing you to pick the right design for your home. Combined with our quality underfloor heating systems, you won’t ever want to leave you conservatory!

Call us today on 01332 75 70 70 to discuss your options and for some expert advice on tiling your conservatory.


Featured Image: Flickr – Martin LaBar

Invisible Comfort: The Benefits Of Underfloor Heating In Your Home

A luxury once reserved for the comfortably well-off, underfloor heating is no longer an unreachable dream for your home. Now more efficient and affordable than it’s ever been, underfloor heating can be the perfect addition to your home.

Although it’s particularly popular to install in bathrooms, where you usually have to tiptoe across cold tiles or laminate, the reduction in cost and increase in the efficiency and effectiveness of modern systems mean that it’s an ideal heating choice for any number of rooms in your house.

Saves Space

The beauty of underfloor heating is in the name – while the fact that it’s underneath your floor is one of the reasons why it’s so effective, it also means that you can comfortably heat any room in your house with a system that’s hidden and literally takes up no extra room.

By ditching bulky radiators in favour of any of our underfloor heating systems here at Raynesway Tile Warehouse, you’re able to open up your bathroom, living room or bedroom up with some welcome additional space.

Effective & Efficient Heating

By radiating heat from the ground up, instead of heating from the centre of the room like most conventional radiators, underfloor heating systems actually allow you to feel the benefit of the systems output.

As such, you get a much more noticeable heating benefit in lower areas of the room, whereas conventional radiators would leave floors cold and waste energy by heating more towards the ceiling. Plus, if you install underfloor heating in your bathroom, nothing beats stepping onto pre-heated floors first thing in the morning!

Lowers Heating Bills

This really rolls on from the fact that underfloor systems run much more efficiently than their radiator cousins – by heating your rooms more effectively with less energy used, your bills will be lower. It’s really as simple as that! Savings can be anything small such as under 15%, or as high as 40%, depending on the cost and effectiveness of your current heating system.

If you’re looking to reduce your heating bills, but at the same time increase the efficiency of your home’s heating system, then look no further than the underfloor heating ranges we offer here at Raynesway Tile Warehouse.

Our friendly knowledgeable team can help you pick the right size and type of system that meets your needs. Call us today on 01332 75 70 70 for expert advice and information on our full range of systems.